jeje
عضو فعال

عدد المساهمات : 225
نقاط : 603
تاريخ التسجيل : 05/12/2010
 |  موضوع: موديل أبريق شاي و بالشرح حصرياً موضوع: موديل أبريق شاي و بالشرح حصرياً  الأحد يونيو 12, 2011 2:24 pm الأحد يونيو 12, 2011 2:24 pm | |
|
ابريق شاي راااائع طريقة العمل بسيطة و ممكن عمله باحد هذه الباترونات  
Easy Ripple Tea Cosy
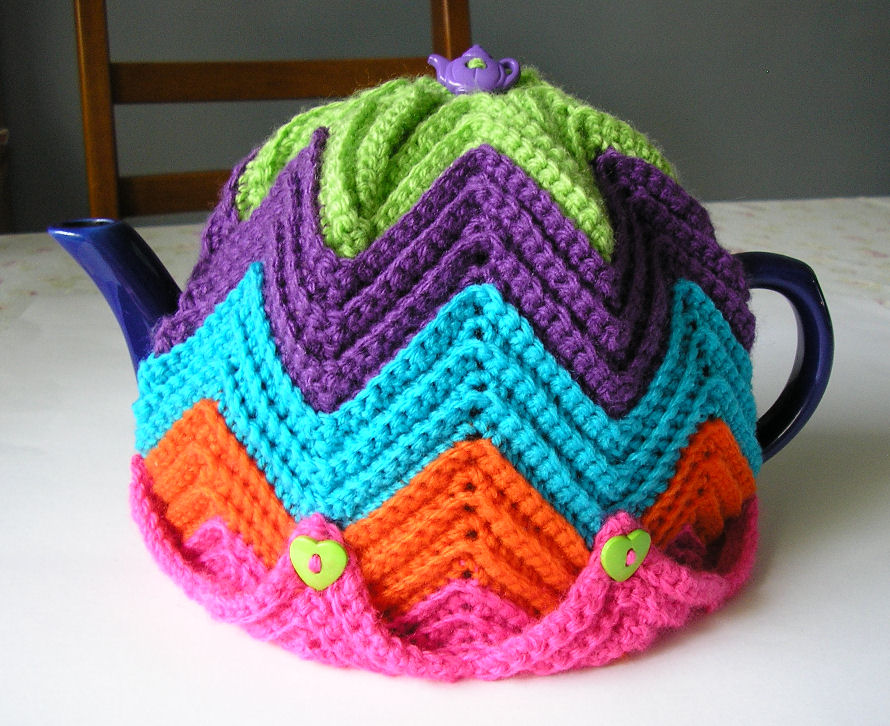
Cosy on left will fit a 6 cup teapot, cosy
measures 44cm circumference, 19cm tall. Cosy on right fits a 3-4 cup
teapot, cosy measures 40cm circumference, 15cm tall.You'll need 8ply/DK yarn, oddments of each colour, 4mm (G) crochet hook & some cute buttons.The buttons I used were from a large novelty bag of buttons from Spotlight.Pattern uses English crochet terminology.
Tension - 17 dc over 10cm using 4mm (g) hook - tension checked over
a straight piece of crochet, not over the ripple stitch pattern. Please
check your tension, the wrong tension /yarn will affect the finished
size.Terms - dec over next 3 sts - insert hook in next
st, yo & draw up a loop, miss next st, insert hook in next st, yo
& draw up a loop, yo & draw through all 3 loops on hook.dec over next 2 sts - Insert hook in next
st, yo & draw up a loop, insert hook in next st, yo & draw up a
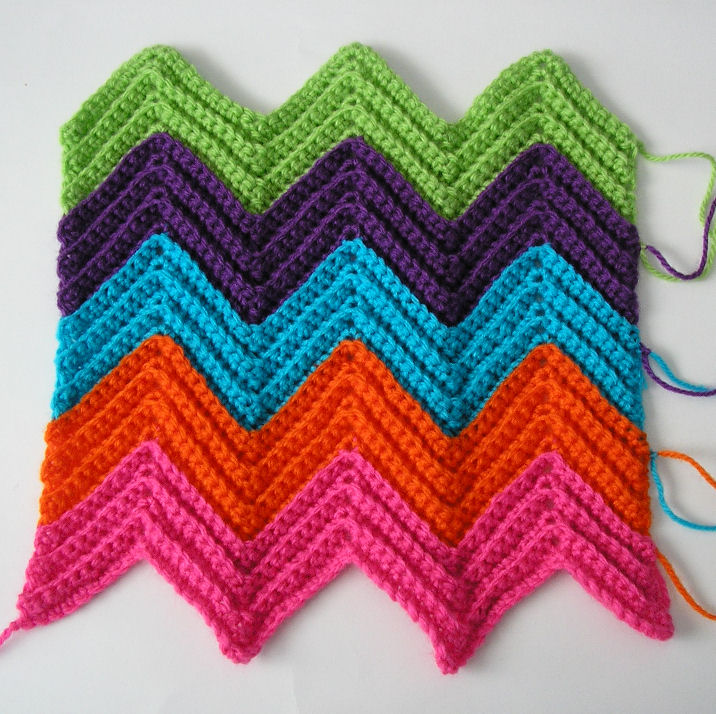
loop, yo & draw through all 3 loops on hook.Make a front & back.Foundation Row - Make 64 ch, miss first ch, 1dc in next 9 ch *
3dc in next ch, 1dc in next 9 ch, dec over next 3 ch, 1 dc in next 9
ch. Repeat from * to last 10 ch, 3dc in next ch, 1 dc in next 9 ch.1st row - Work in back loop of every dc to give a ridged effect.1ch, dec over next 2 sts, 1dc in next 8dc * 3dc
in next dc (which should be the middle dc of the 3dc in last row), 1dc
in next 9 dc, dec over next 3sts, 1 dc in next 9 dc. Repeat from * to
last 11 sts, 3dc in next dc, 1dc in next 8dc, dec over last 2 sts.Repeat 1st row, working in stripes of 6 rows, or
as you like. Keep working until the top point of the ripples when
brought in to the middle, just clear the top of your pot, adding a
little height for a seam allowance.Remembering, the bottom flaps of the cosy will be
turned up to produce a flat edge on the bottom, so make your
measurement from that folded edge.My cosy had 30 rows all up, but measure yours for a good fit, as all pots are different.
Just a hint, if you come to the correct height & you're only a
couple of rows into a new colour, you're better off going back &
continuing with the last stripe colour instead. You'll find otherwise
when you join up the top you'll loose your new colour in the seam. Assembly
Use what threads you have at the sides to do your seams, sew in all others you won't use.
Sew the side seams. From the bottom, sew the seam in reverse (to the
outside of the cosy) only for this section under the spout &
handle. When you turn the flap up you will then have a neat finish on
the outside.
Hope you can see from the photo what I mean.

sew the sides together down from the top using a normal seam (you don't
do this in reverse), to fit above your handle & spout.
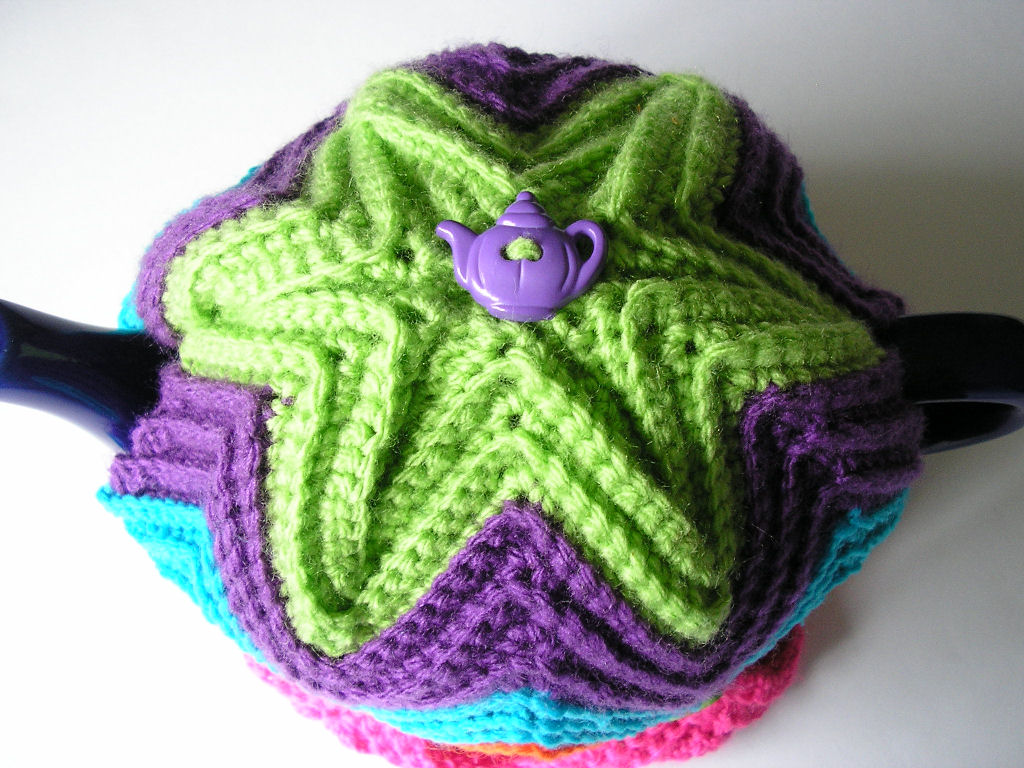
Turn the cosy inside out to sew the top. You'll be sewing the edges of
the triangles together, so that all the points are brought into the
centre. You'll get a better finish if you do a backstitch seam about 1
row in, instead of a flat seam. The pieces really need to be taken in a
bit to get a good fit. Pin first if you want to check for fit (I love
to pin).
If you find you have a little hole in the centre just gather it in & fasten off.
Hopefully it will look like this if you can follow my primitive
directions lol. I'm really loving that green & purple, what would
the world be like without colour!
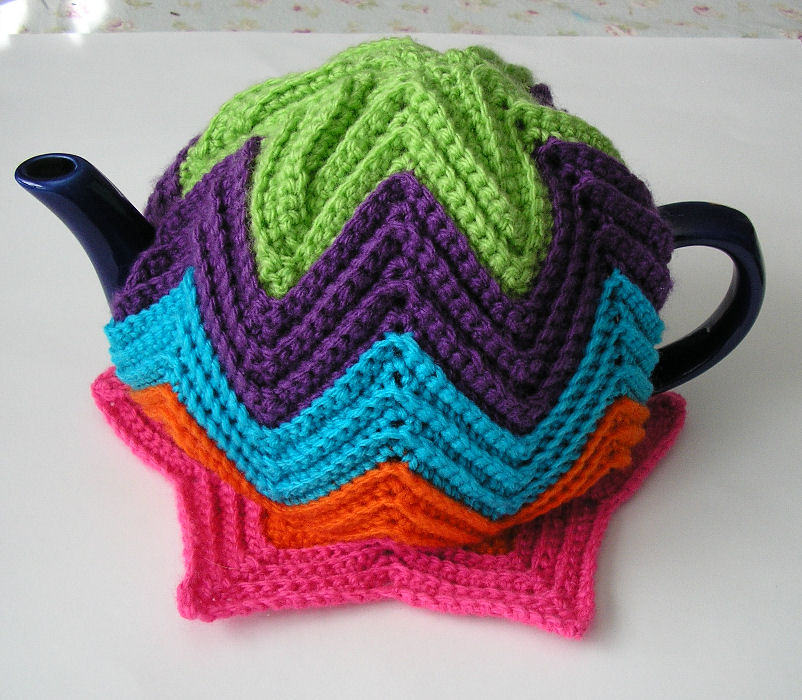
 Almost done, now you get to play with buttons. Almost done, now you get to play with buttons.
You'll have a cosy which looks like this (left) unless I've totally led
you astray (liana). As you can see from the previous photo I didn't put
a button under the spout & handle but just folded the flap up &
stitched it in place. Fold the other flaps up to create your flat
bottom edge, & sew on your buttons.
Don't forget your button, flower, big flashy jewel, anything you like to go on the top.
| |
|